Circular carousel with MotionLayout
How create a circular carousel of cards with MotionLayout version beta8.

Continuing with a series of several MotionLayout posts that I will be releasing in the coming weeks, this is the second of the complete saga of IV articles (you can see the first one here).
In this case, we will work together step by step to reach this final result:

Before starting
I would like to tell you what is the strategy of our animation, the circular effect of our carousel is achieved thanks to the circular positions that allow us to use ContraintLayout, if you have never used these references, I recommend reading this documentation where it explains how to work with them. If you have already worked with these references, the strategy is very simple, basically we will play with these circular references, changing their degree from one state to another, and we will also play with the rotation on the same axis of the card, achieving that effect that runs left or right circularly.
Now, let’s start ...
Add MotionLayout in the project
To do this we add the dependency in the build.gradle file of your project.
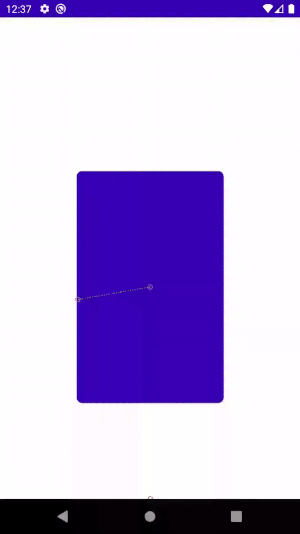
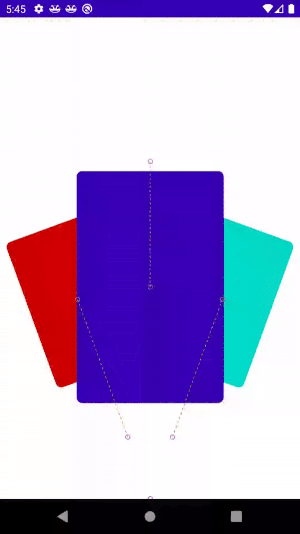
implementation 'androidx.constraintlayout:constraintlayout:2.0.0-beta8'Let’s start with our first card in the center of our MotionLayout , and we also add a view that we will assign the id: "@+id/guide" which we use as a circular reference of all our cards that we will add.
Want to read this story later? Save it in Journal.
First interaction
Let’s start with the transitions on our first card. This carrousel is executed with a swipe left or right, these swipe’s are going to move the card from an initial state to a final state that we will declare in our MotionScene.
A complete example of what we will build in the MotionScene:
Swipe left
We will declare the start state in our MotionScene, where the cardCenter card will have an angle of 0º with reference to our guide and a rotation on its axis of 90º, and also its elevation by 5dp.
To learn more about the basics of the MotionScene, I recommend that you read this set of Medium articles that Nicolas Roard wrote.
Now, our final state for our first interaction, which we will assign the following id: @id/leftCard. In this state, our card will change its angle to 340º, its rotation to 70º and elevation to 4dp.
We are close to achieving our first interaction, we can only add the transition that will execute the change of state of our MotionLayout.
After our first interaction, we will obtain a result like the following:
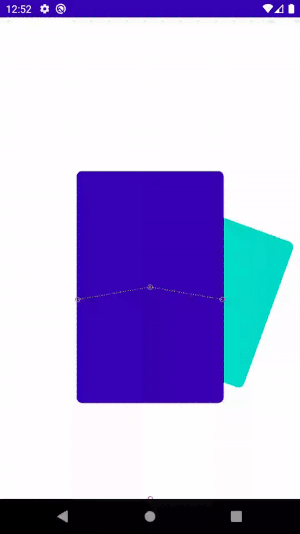
Add a second card
The next step is to add a second card, with a circular reference to guide with an angle of 20º, a rotation on its same axis of 110º and elevation of 4dp. And in its final state of the first interaction, its circular angle and rotation will remain with the same values as our first card.
Let’s see how our MotionScene looks with the same states, but adding the second card.
And we will obtain the following result:
Now we will improve the course of our first card, to give a more natural effect when moving to the left. For this we are going to use the fabulous KeyFrameSet, we will add a KeyPosition in our 50% of the route before reaching its end point.
Let’s look at the result of adding theKeyPosition :
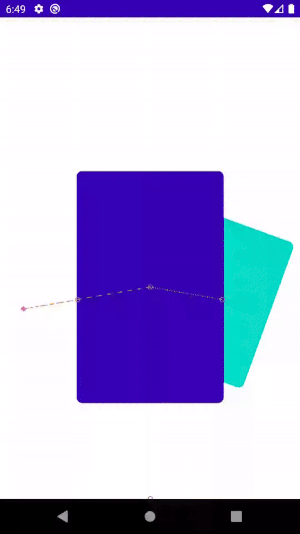
Now we will add a third card to the left of our center card, to simulate the circular effect. This new card will have a circular reference to guide with an angle of 340º, a rotation on its axis of 70 and 4dp of elevation, and in its final state an angle of 320º, rotation of 50º and an elevation of 3dp.
This will be our initial and final status for our third card:
Let’s see how our first interaction looks like:
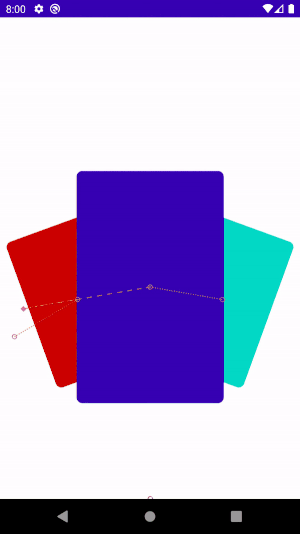
Swipe right
We will arm the swipe to the right in a summarized way. We will create the ConstraintSet firstCard, we will change the direction of the transition to dragRight, the directions of circular guide and rotation to the right in all its attributes.
Let’s see how the whole set looks in our MotionScene:
We will obtain the following result:

Card detail
Last transition, we will arm a swipe up on our central card to simulate an effect of seeing the detail of the selected card.
To do this, we will build a new transition, and we will play with the circular distance of the other cards, to give a depth effect.
We will create the ConstraintSet for this new transition. This is where we will change our central card to a rotation on its axis at 0º and raise it to the top of the screen, on the rest of the cards we will change the circular radius to 90dp.
The result of this new transition:
Final comments
This is a very simple but really attractive animation. We achieved the infinite effect with a very simple logic that you can see in the GitHub repository.
In the coming weeks, other Medium articles will come explaining more animations with MotionLayout, this is the second article in a mini saga of IV chapters.
Remember that you can see the first post here: Tinder MotionLayout
Second talk about of Motion Layout
Below you can see my second talk about Motion Layout where I explain how to make this animation step by step.
Twitter @RodrigoMartinD
